Table of Contents
Import Content Plan Interface Documentation #
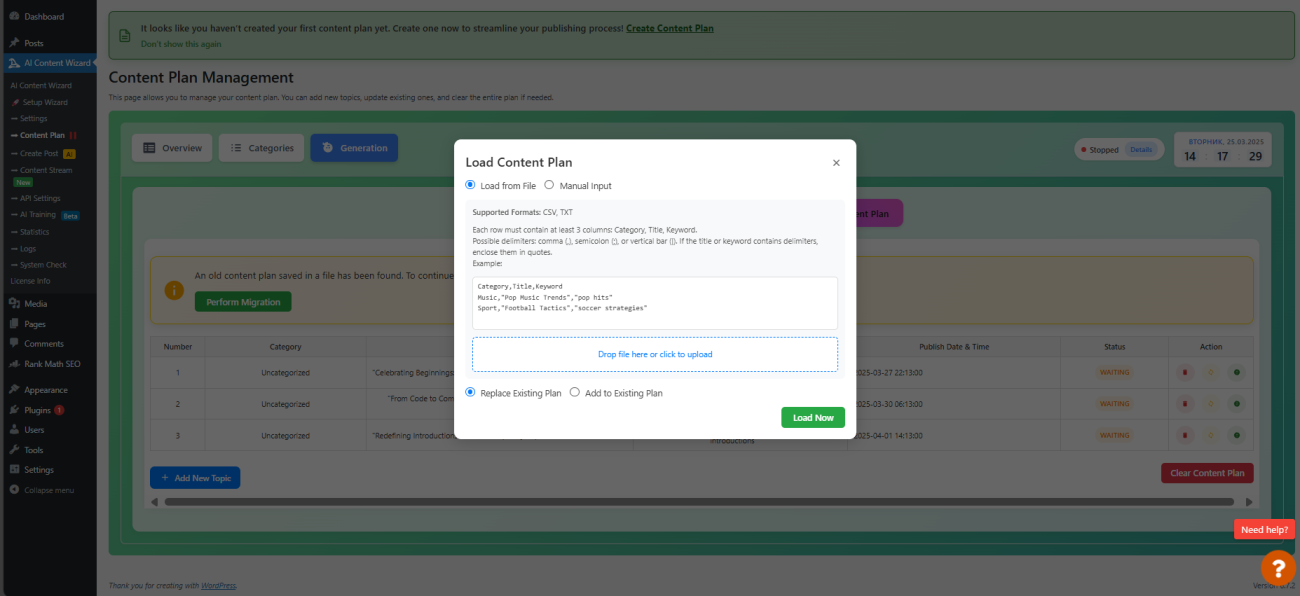
The Import Content Plan page allows you to load a content plan from an external source. You have two options: uploading a file or entering the data manually. This page is designed to help you easily integrate your existing content ideas, topics, and keywords into the Content Plan system.
1. Import Modes #
The interface provides a toggle between two modes:
- Load from File:
- Purpose: Allows you to upload a file that contains your content plan data.
- Supported File Formats:
- CSV
- TXT
- File Format Requirements:
- Each row in the file must contain at least three columns: Category, Title, and Keyword.
- The columns should be separated by one of the following delimiters:
- Comma (
,) - Semicolon (
;) - Vertical bar (
|)
- Comma (
- If the Title or Keyword fields contain any of the delimiter characters, enclose those fields in quotes.
- Example File Content:
Category,Title,Keyword
Music,"Pop Music Trends","pop hits"
Sport,"Football Tactics","soccer strategies"
- Manual Input:
- Purpose: Allows you to enter your content plan data manually in a text area.
- Input Format Options:
- Titles Only:
- One title per line.
- The system will automatically generate keywords for each title.
- Example:
- Titles Only:
My First Title
Another Great Title
Yet Another Title
- Keywords Only:
- One or more keywords per line.
- Keywords can be separated by commas, semicolons, or vertical bars.
- The system will generate a title for each set of keywords.
- Example:
keyword one, keyword two; keyword three | keyword four
- Titles + Keywords:
- Each line must follow the format
Title|Keyword. - Example:
- Each line must follow the format
My Title 1|Keyword 1
My Title 2|Keyword 2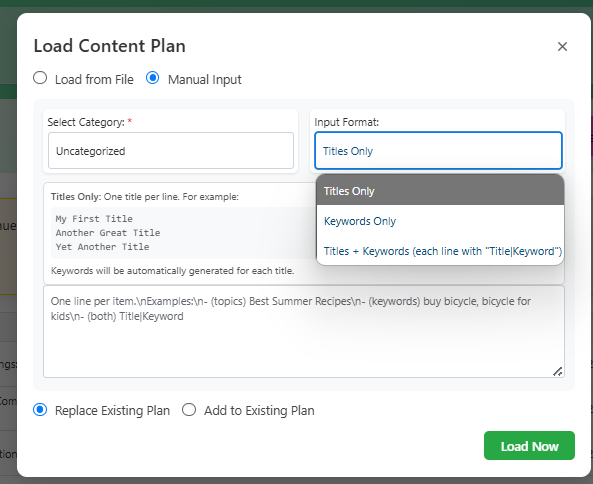
2. Import Interface Layout #
- Mode Selection:
- A set of radio buttons allows you to choose between Load from File and Manual Input.
- The default mode is set to Load from File.
- File Upload Block:
- When Load from File is selected, you will see a file upload area.
- Instructions:
- The area displays a message such as “Drop file here or click to upload.”
- Once a file is selected, its name will be displayed.
- Make sure your file adheres to the supported format guidelines.
- Manual Input Block:
- When Manual Input is selected, a text area and additional input options are displayed.
- Input Options:
- Select Category:
- A dropdown list allows you to choose a category to which the manually entered topics/keywords will be assigned.
- Input Format:
- A dropdown menu to choose the input format: Titles Only, Keywords Only, or Titles + Keywords.
- Hints:
- Contextual hints are provided for each input format:
- For Titles Only, an example is shown and a note indicates that keywords will be auto-generated.
- For Keywords Only, an example is provided and a note explains that titles will be generated automatically.
- For Titles + Keywords, an example shows the correct format using a vertical bar (
|) as a separator.
- Contextual hints are provided for each input format:
- Manual Input Text Area:
- A text area is provided for you to paste or type your content plan items.
- Select Category:
- Import Options:
- You can choose whether to Replace the Existing Plan or Add to the Existing Plan.
- This is done via another set of radio buttons.
- Load Now Button:
- After selecting the import mode and providing your data, click the Load Now button to start the import process.
- A preloader will appear indicating that the import is in progress.
3. Additional Considerations #
- Data Quality:
- For the system to work effectively, each category should ideally contain several posts.
- This helps the content generation algorithm understand the context and style of articles for that category.
- Customization per Category:
- You can specify generation wishes and select an author for each category on the Categories tab.
- These settings ensure that topics are generated in alignment with your content strategy.
- Intensity and Shuffling:
- The Frequency setting in each category (measured in posts per week) influences the number of topics generated.
- The system uses a random shuffling algorithm to distribute topics evenly across categories and the overall plan period.
- This ensures that the publication schedule is balanced and that topics from different categories are interleaved naturally over time.
Summary #
The Import Content Plan interface provides a flexible way to input your content plan data into the system. Whether you choose to upload a file or enter data manually, you must adhere to the following guidelines:
- File Format: CSV or TXT files with at least three columns: Category, Title, and Keyword. Use commas, semicolons, or vertical bars as delimiters, and enclose fields containing delimiters in quotes.
- Manual Input:
- Titles Only: Enter one title per line; keywords will be generated automatically.
- Keywords Only: Enter keywords separated by commas, semicolons, or vertical bars; titles will be generated automatically.
- Titles + Keywords: Use the format
Title|Keywordfor each line.
- Import Options:
- Choose to replace or add to the existing content plan.
- Category Requirements:
- Ensure that each category has several posts to provide context.
- Use individual settings (such as generation wishes and author selection) for better topic generation.
- The intensity (frequency) setting for each category determines the number of posts per week and influences the random shuffling mechanism for an even distribution.
This comprehensive interface ensures that your content plan is imported correctly and lays the foundation for a balanced and strategic content generation process.


